
Prerequisites
- Angular IDE
- Node.js and npm
- Basic knowledge of TypeScript, HTML and CSS
Creating a New Angular Project
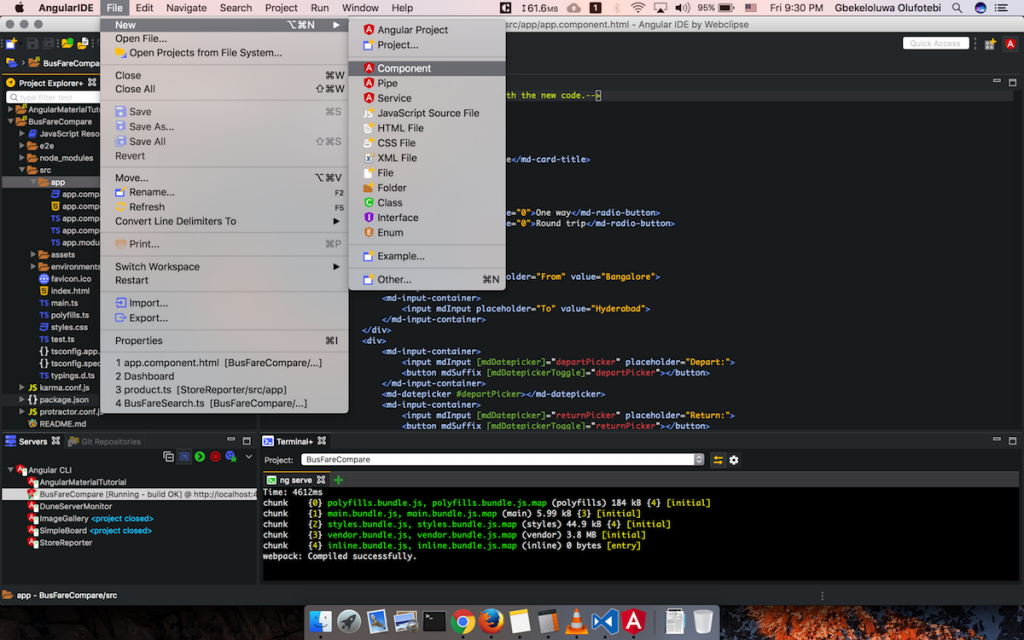
With Angular IDE open, one of the ways you can start a new project is to hit Option + Command + N and select Angular Project.
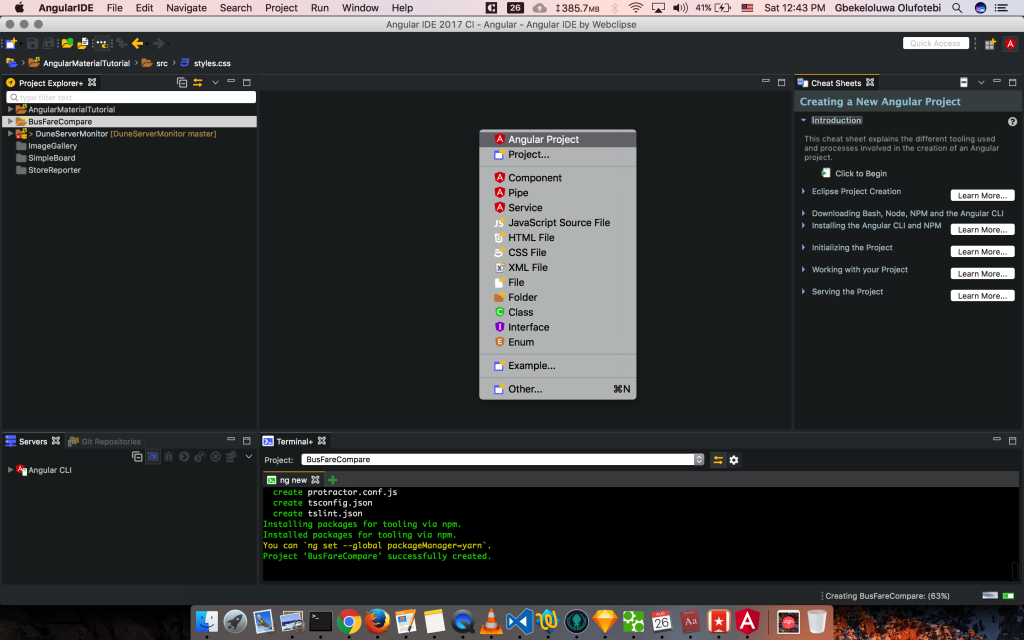
Create a new Angular project
Now you will see the new Angular project wizard, where you can select the Node.js, NPM and Angular CLI versions. In the new Angular project wizard, enter BusFare as the project name and select Angular CLI version 1.1.0, Node.js version 6.11.2 and NPM version 3.10.10.
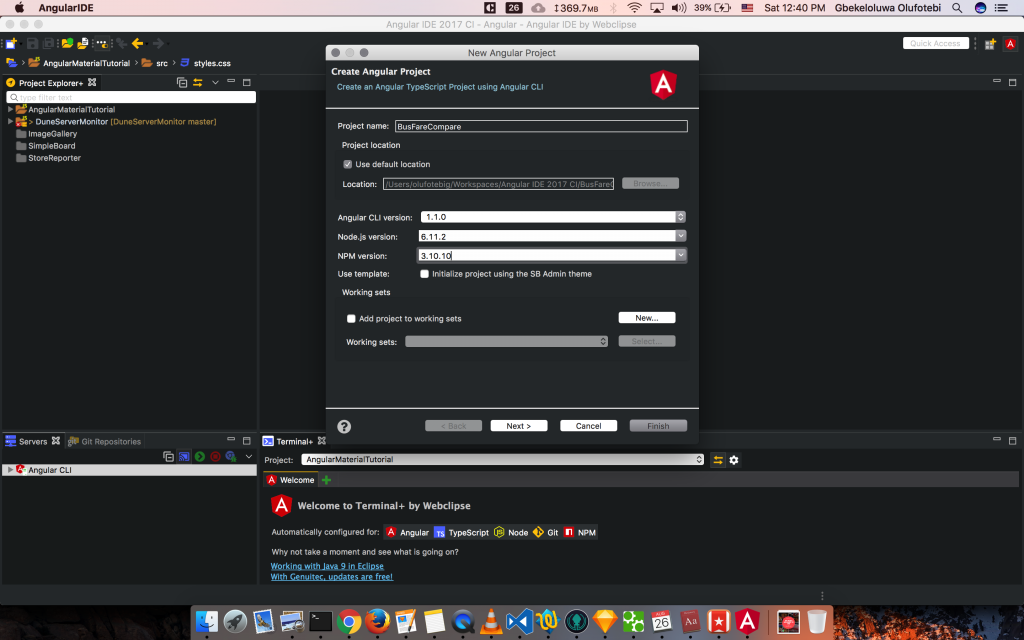
new Angular project wizard
Finally, click Finish to complete the creation of a new Angular 4 project. In the Terminal+ view, you can see commands being executed by Angular CLI, after the installation of all modules is complete we are now ready to continue with our project.
Adding Angular Material
Angular Material is a set of high-quality UI components developed by the Angular team – based Google Material design specification. These UI components help you to build a single, good-looking UI that spans across multiple devices. To install HammerJS, Angular Animations, Angular Material and Angular CDK, type and execute the following commands in Terminal+.
npm install --save hammerjs @angular/animations @angular/material @angular/cdk

install npm modules
Next you add the indigo-pink Angular material theme by adding the following line to your /src/styles.css file
@import "~@angular/material/prebuilt-themes/indigo-pink.css";
Creating the Search Card Component
To create a new Angular component in Angular IDE, we use the menu File > New > Component. In the New Angular CLI Component wizard, enter search-card as element name, under the advanced section make sure Do not create code in it's own directory(--flat) is checked as we want to have a flat directory for this project. Now click Finish to complete creation of the search card component. Four new files; src/app/search-card.component.css,src/app/search-card.component.html,src/app/search-card.component.spec.ts,src/app/search-card.component.ts were created and the content of app.module.ts updated. Let us take a look at some of the things to note when we create a new component via Angular CLI using Angular IDE.
Important File Changes
The file named src/app/search-card.component.ts is the component file for our newly created Search Card component, and it’s content is below:
import { Component, OnInit } from '@angular/core';

@Component({
  selector: 'app-search-card',
  templateUrl: './search-card.component.html',
  styleUrls: ['./search-card.component.css']
})
export class SearchCardComponent implements OnInit {

  constructor() { }

  ngOnInit() {
  }

}
At the top of the file, Component and OnInit are imported from @angular/core (each Angular library name begins with the @angular prefix), Component is a decorator function that we use to notify angular that a class is an Angular component and OnInit is a trait that our component must inherit in other to respond to the ngOnInit lifecycle hook. You can read more about Angular lifecycles on the Angular site here.
Looking at the metadata passed to the @Component decorator in our component, we see that in order to use this component in an Angular template the html tagname will be app-search-card as specified by the selector metadata attribute, also this component will use the content of src/app/search-card.component.html as it’s Angular template and be styled with src/app/search-card.component.css.
We can now use the search card component in our app component, because app.module.ts has been updated as follows; SearchCardComponent is imported, and added to the declarations property of the @NgModule metadata. So update the content of src/app/app.component.html to be
<md-toolbar color="primary">
  <span>BusFare</span>
</md-toolbar>
<app-search-card></app-search-card>
Storing user search input
In order to search for bus rates, we need the user to input the following information:
* Trip type (One way or return trip)
* Origin
* Destination
* Departure date
* Return date (if trip type is return)
Let us create a search card interface, to be used to type-check the data from the templates in accordance to ur requirements above. Update src/app/search-card.component.ts
import { Component, OnInit } from '@angular/core';
// Additions start
interface SearchCardInterface {
  tripType: number;
  origin: string;
  destination: string;
  departureDate: Date;
  arrivalDate: Date;
}
// Additions end
....
Now let us create a model property of type SearchCardInterface in SearchCardComponent, to do this you update src/app/search-card.component.ts as follows
...
export class SearchCardComponent implements OnInit {
  model: SearchCardInterface;

  constructor() { }

  ngOnInit() {
    this.model = {tripType: '0', origin: 'Bangalore', destination: 'Hyderabad', departureDate: new Date(),
    arrivalDate: new Date()};
  }

}

...
Template
Let us enter the following code in src\app\search-card.component.html
<md-card class="bus-ticket-card">
 <md-card-title>Book bus tickets online</md-card-title>
 <md-card-content>
 <form (ngSubmit)="onSubmit()" #searchForm="ngForm">
 <div>
 <md-radio-group name="tripType" [(ngModel)]="model.tripType" required>
 <md-radio-button value="0">One way</md-radio-button>
 <md-radio-button value="1">Round trip</md-radio-button>
 </md-radio-group>
 </div>
 <div>
 <md-input-container>
 <input mdInput name="origin" placeholder="Origin" [(ngModel)]="model.origin" required>
 </md-input-container>
 <md-input-container>
 <input mdInput name="destination" placeholder="Destination" [(ngModel)]="model.destination" required>
 </md-input-container>
 </div>
 <div>
 <md-input-container>
 <input mdInput name="departureDate" [(ngModel)]="model.departureDate" [mdDatepicker]="departPicker" placeholder="Depart:" required>
 <md-datepicker-toggle mdSuffix [for]="departPicker"></md-datepicker-toggle>
 </md-input-container>
 <md-datepicker [startAt]="model.departureDate" #departPicker></md-datepicker>
<md-input-container>
<input mdInput name="arrivalDate" [(ngModel)]="model.arrivalDate" [mdDatepicker]="returnPicker" placeholder="Return:" required>
 <md-datepicker-toggle mdSuffix [for]="returnPicker"></md-datepicker-toggle>
 </md-input-container>
 <md-datepicker [startAt]="model.arrivalDate" #returnPicker></md-datepicker>
 </div>
 <button md-raised-button color="accent" [disabled]="!searchForm.form.valid">Let's Go</button>
 </form>
 </md-card-content>

</md-card>
Add some style in src\app\search-card.component.css
.bus-ticket-card{
    width: 400px;
    margin: 24px auto;
}
Imports
Next we update src/app/app.module.ts, the file changes are shown in the code below
...
import {BrowserAnimationsModule} from '@angular/platform-browser/animations';
import {MdButtonModule, MdCardModule, MdDatepickerModule, MdInputModule, MdNativeDateModule, MdRadioModule,
   MdToolbarModule } from '@angular/material';
import { FormsModule } from '@angular/forms';

...
  imports: [
    BrowserModule,
    BrowserAnimationsModule,
    FormsModule,
    MdButtonModule,
    MdCardModule,
    MdDatepickerModule,
    MdInputModule,
    MdNativeDateModule,
    MdRadioModule,
    MdToolbarModule
  ],
...
Creating the Search Service
Let us create a search service, which uses the data collected from user input to make an API request for bus tickets available. We will be using the API provided by goibibo, so head over to the developer portal to create an account so you can follow along.
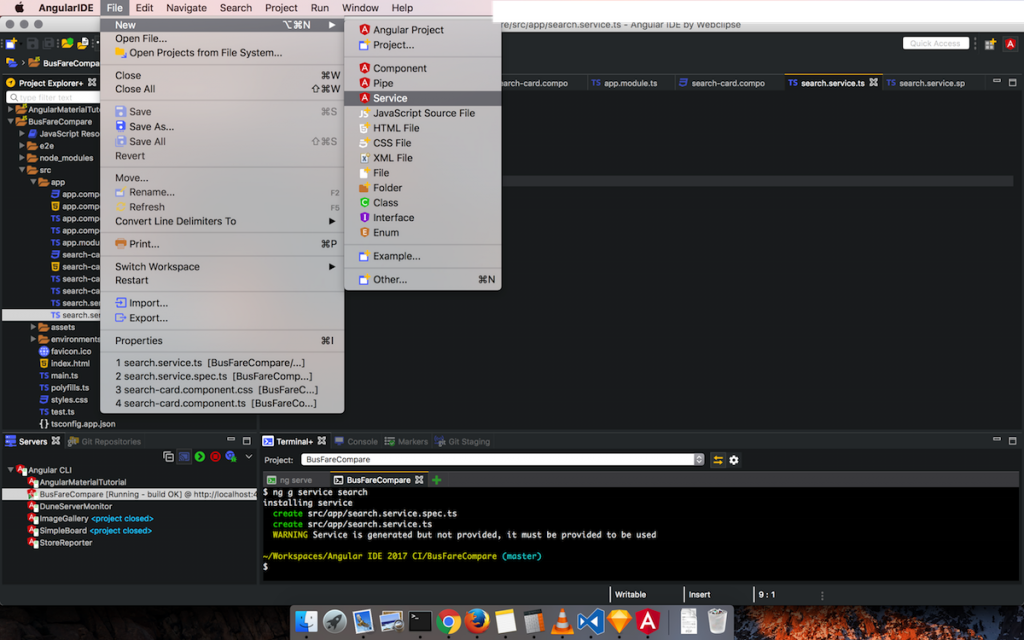
We create the search service, by using the menu ‘File’ > ‘New’ > ‘Service’, in the new service wizard, enter the search-card element name and click finish.
We will need to use the search-card interface usedSearchCardInterface in src/app/search-card.component.tssrc/app/search.service.ts, so let us extract it into its own file. Press CMD + OPTION + N (or CTRL + ALT + N) on your keyboard, and select class in the pop-up menu. In the New Typescript Class wizard, fill in forSearchCardInterface Name and assearch-card.interface.ts file name. Update the content of the newly created file as follows:
export interface SearchCardInterface {
  tripType: string;
  origin: string;
  destination: string;
  departureDate: Date;
  arrivalDate: Date;
}
Now let us update src/app/search-card.component.ts as follows:
* Delete the SearchCardInterface code block
* Import SearchCardInterface from ./search-card.interface
The code block for importing is below
import { SearchCardInterface } from './search-card.interface';
You should also import SearchCardInterface in your search-card service, by adding the code above to the import section of src/app/search.service.ts. Now let us create a method getSearchResults in our search-card service, that takes the user input bound to model: SearchCardInterface and gets search results from the goibibo api. The code snippet for the getSearchResults stub is below:
src/app/search.service.ts
import { Injectable } from '@angular/core';

import { SearchCardInterface } from './search-card.interface';

@Injectable()
export class SearchService {

  constructor() { }

  getSearchResults(model: SearchCardInterface) {
 }

}
Let us now connect this stub method to the onSubmit method of our search-card component, the content of src/app/search-card.component.ts should be
import { Component, OnInit } from '@angular/core';
import { SearchCardInterface } from './search-card.interface';

import {SearchService} from './search.service';

@Component({
  selector: 'app-search-card',
  templateUrl: './search-card.component.html',
  styleUrls: ['./search-card.component.css']
})
export class SearchCardComponent implements OnInit {
  model: SearchCardInterface;

  constructor(private service: SearchService) { }

  ngOnInit() {
    this.model = {tripType: '0', origin: 'Bangalore', destination: 'Hyderabad', departureDate: new Date(),
    arrivalDate: new Date()};
  }

  onSubmit() {
    this.service.getSearchResults(this.model);
  }
}
Notice that we did not add SearchService to the provider of the search-card component, we will add it to src/app/app.component.ts, this is so because we want all the children of app component to use the same instance of search service. The content of src/app/app.component.ts should be updated as follows:
import { Component } from '@angular/core';
import {SearchService} from './search.service';

@Component({
  selector: 'app-root',
  templateUrl: './app.component.html',
  styleUrls: ['./app.component.css'],
  providers: [SearchService]
})
export class AppComponent {
  title = 'app';
}
Updating getSearchResults stub
We are going to user the user input to make an HTTP request to the API, and for this, we will need the Angular HttpClient. Let us include HttpClientModule among the imports in src\app\app.module.ts
import {HttpClientModule} from '@angular/common/http';
...

  imports: [
    ...
    HttpClientModule,
    ...
  ]
Next we inject HttpClient in our search service, and also develop the code for the getSearchResults method in src/app/search.service.ts
import { Injectable } from '@angular/core';
import { Subject } from 'rxjs/Subject';
import { HttpClient } from '@angular/common/http';

import { SearchCardInterface } from './search-card.interface';

@Injectable()
export class SearchService {

// Observable source
 private resultsSource = new Subject<any>();

// Observable stream
 results$ = this.resultsSource.asObservable();
constructor(private http: HttpClient) { }
getSearchResults(model: SearchCardInterface) {
 const baseUrl = 'http://developer.goibibo.com';
 const endpoint = '/api/bus/search/';
 const params = {
 app_id: '2db00098',
 app_key: 'ad8f03752322e5f4afce7ffd674561e6',
 format: 'json',
 source: model.origin,
 destination: model.destination,
 dateofdeparture: this.formatDate(model.departureDate),
 dateofarrival: this.formatDate(model.arrivalDate)
 }
 const url = `${baseUrl}${endpoint}?${this.objToUrlParams(params)}`;
 this.http.get(url).subscribe(data => {
 this.resultsSource.next(data['data']);
 });
 }
// This is an util method to return YYYYMMDD date string
 formatDate(date: Date): string {
 const mm = date.getMonth() + 1; // getMonth is zero indexed
 const dd = date.getDate();
 return `${date.getFullYear()}${ mm > 9 ? mm : '0' + mm}${dd > 9 ? dd : '0' + dd}`;
 }

// This is a method to convert a dictionary to url param string
 objToUrlParams(params): string {
 let toret = '';
 for (const key in params) {
 if (params.hasOwnProperty(key)) {
 toret += `${key}=${encodeURIComponent(params[key])}&`;
 }
 }
 return toret;
 }

};
Creating the Search Result Component
Create a new component, SearchResultComponent with the element name search-result and and ensure that in the Advanced section of the New Angular CLI Component wizard, you have the --flat option checked. First, we include our newly created component in our app component, by updating src/app/app.component.html
<md-toolbar color="primary">
  <span>BusFare< /span>
</md-toolbar>
<app-search-card>< /app-search-card>
<app-search-result>< /app-search-result>
Next, we will add search result component to subscribe to the search service in order to get search results, let us do this by updating src/app/search-result-component.ts
import { Component, OnInit } from '@angular/core';
import {SearchService} from './search.service';
import { Subscription } from 'rxjs/Subscription';

@Component({
  selector: 'app-search-result',
  templateUrl: './search-result.component.html',
  styleUrls: ['./search-result.component.css']
})
export class SearchResultComponent implements OnInit {
  subscription: Subscription;
  results: object;

  constructor(private service: SearchService) {
    this.subscription = service.results$.subscribe(results =>; {
      this.results = results;
    })
  }

  ngOnInit() {

  }
}
src/app/search-result.component.html
<section *ngIf="results">
<h3>Search results</h3>
<table >
<thead>
<tr>
<th>origin</th>
<th>destination</th>
<th>seat</th>
<th>fare.totalfare</th>
<th>duration</th>
</tr>
</thead>
<tbody>
<tr *ngFor="let item of results.onwardflights">
<td>{{item.origin}}</td>
<td>{{item.destination}}</td>
<td>{{item.seat}}</td>
<td>{{item.fare.totalfare}}</td>
<td>{{item.duration}}</td>
</tr>
</tbody>
</table>
</section>
We style the search result table, by including our style rules in src/app/search-result.component.css
table {
  border: 1px solid #ccc;
  border-collapse: collapse;
  margin: 0;
  padding: 0;
  width: 100%;
  table-layout: fixed;
}
table caption {
  font-size: 1.5em;
  margin: .5em 0 .75em;
}
table tr {
  background: #f8f8f8;
  border: 1px solid #ddd;
  padding: .35em;
}
table th,
table td {
  padding: .625em;
  text-align: center;
}
table th {
  font-size: .85em;
  letter-spacing: .1em;
  text-transform: uppercase;
}
@media screen and (max-width: 600px) {
  table {
    border: 0;
  }
  table caption {
    font-size: 1.3em;
  }
  table thead {
    border: none;
    clip: rect(0 0 0 0);
    height: 1px;
    margin: -1px;
    overflow: hidden;
    padding: 0;
    position: absolute;
    width: 1px;
  }
  table tr {
    border-bottom: 3px solid #ddd;
    display: block;
    margin-bottom: .625em;
  }
  table td {
    border-bottom: 1px solid #ddd;
    display: block;
    font-size: .8em;
    text-align: right;
  }
  table td:before {
    /*
    * aria-label has no advantage, it won't be read inside a table
    content: attr(aria-label);
    */
    content: attr(data-label);
    float: left;
    font-weight: bold;
    text-transform: uppercase;
  }
  table td:last-child {
    border-bottom: 0;
  }
}
Running the app
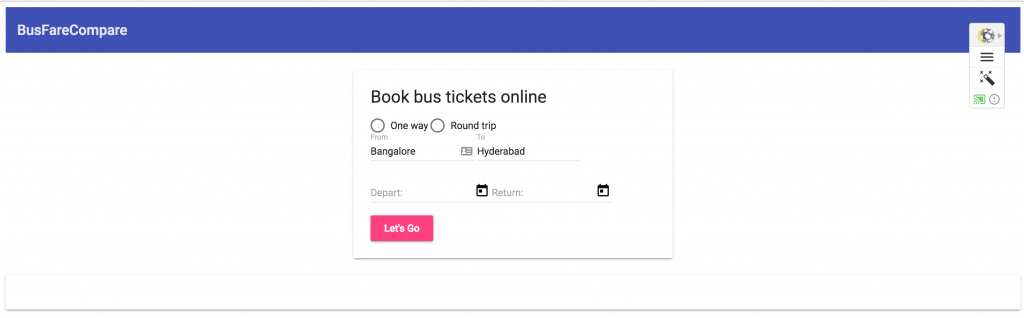
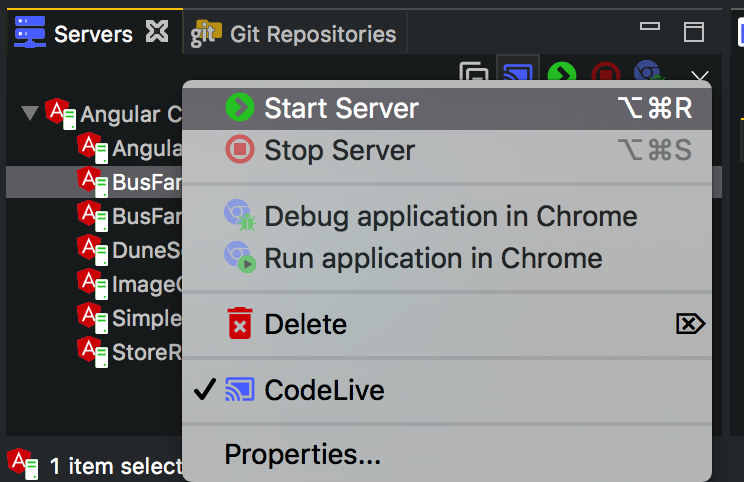
Let us run our Angular app, there is a server view in Angular IDE, in order to open it, select ‘Window’ then Show view then Servers, right click onBusFare and click Start Server, Angular IDE serves the application on localhost port 4200 by default, so open up http://127.0.0.1:4200 in your browser to see the running app.
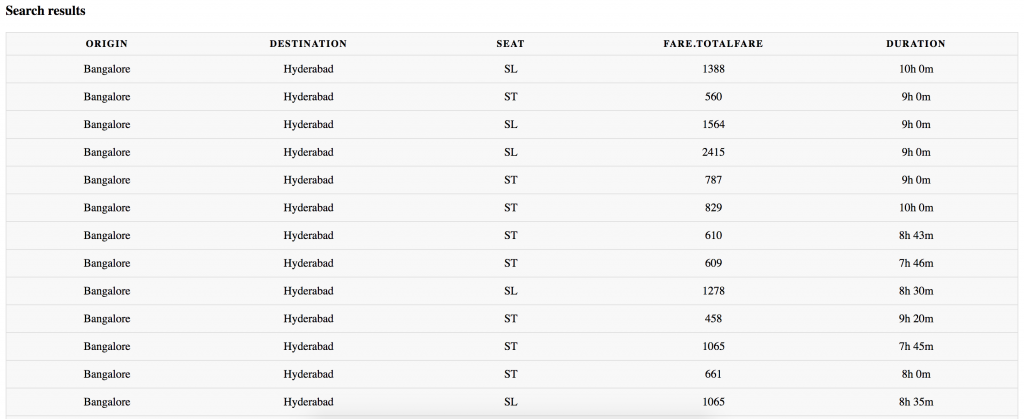
I will leave one way trip selected, enter Bangalore in the origin field and Hyderabad in the destination field, and set an appropriate departure date, then I will click the Let’s Go button.
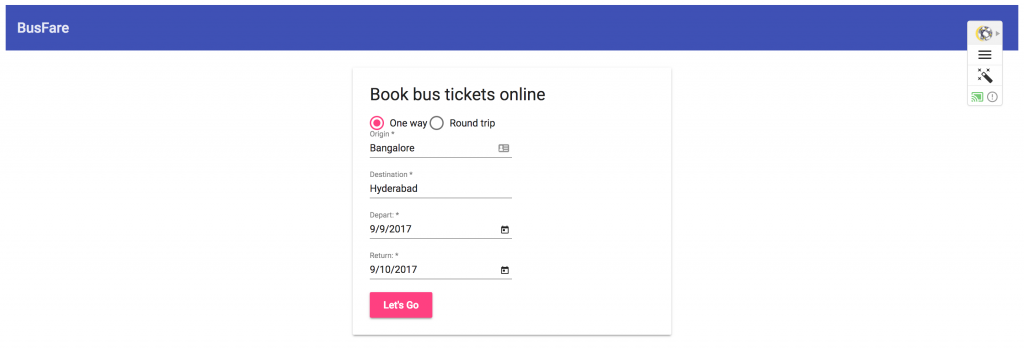
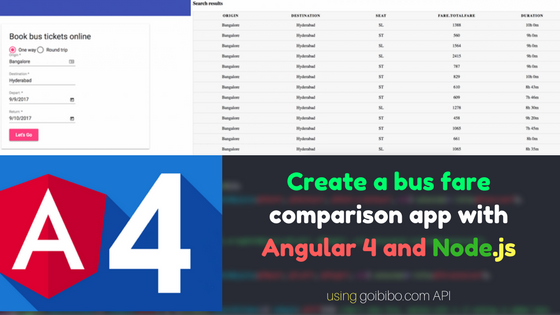
The search results are then displayed as below
Conclusion
There a few very important things to note, storing the API key on the client side might not be ok in a lot of scenarios, you need to check with your API provider. The code can be improved, we can have loading animations while searching, we could use table component from the Angular material. I hope you learn something, Thanks.